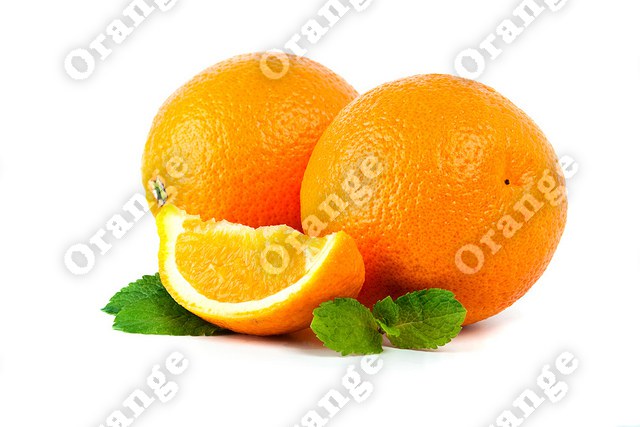
Watermarks for e-shop's images
Anyway business requirements dictated that there is need of using watermarks.
Initial requirements
1. Complicate the third-party use.
2. Visibility of a watermark on a white background and on a black background (and any other color of source image).
3. If the image contains text information, watermark should not greatly prevent to read.
4. Decision without Photoshop and any window interface; able to handle a lot of images (hundreds of thousands).
Style of watermark
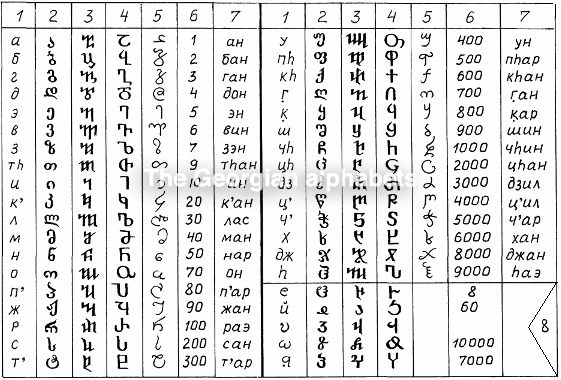
Using only transparent label was not a good solution. If we talk about the white transparent label, it will not be read on a white background. Similarly with other colors.
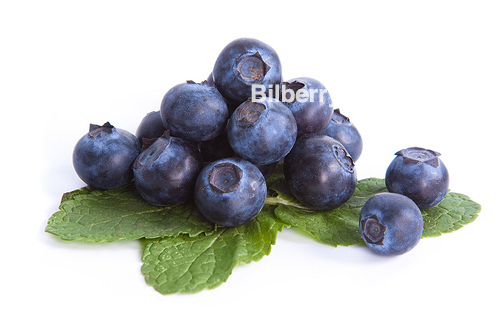
Good solution was to add to the white transparent label its dark transparent shade. The result will be easy to read regardless of the color of the background image.
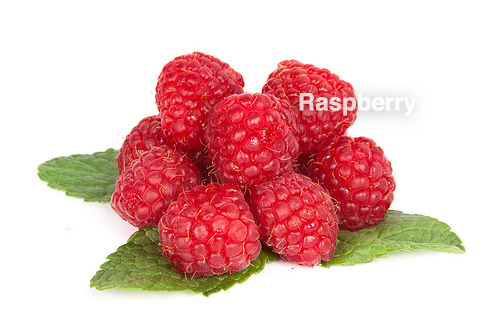
The text is also can be read. For easier reading, you can try to pick the best value for the transparency of the label and its shadow.
Everything seems to be fine, but there is a problem with the protection (by the way on how to remove the watermark from image). Usually watermark in this case the same for all images and is located in the same location. Most often in the center. To remove watermark, blur slightly region with old label, and put over new watermark.
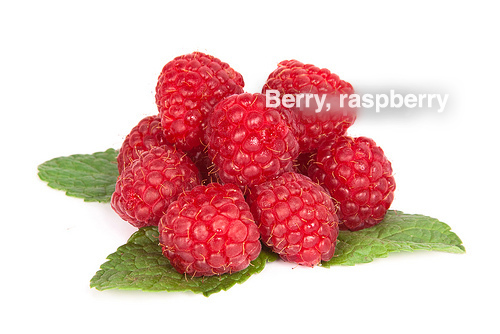
To eliminate this kind of use, tile all image with watermark. The first element should be put exactly in the center and the rest - around him. everything becomes more accurate after rotating label.
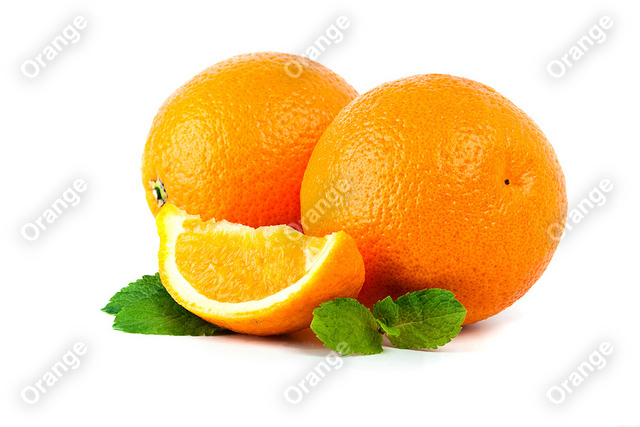
The Author of photos with berries and orange is Kirill Rrasnov.
You can buy these images here: http://www.shutterstock.com/cat.mhtml?gallery_id=419308.
Implementation
Implementation was made with help of ImageMagikc.
In addition to overlay a watermark still required to generate watermarks themselves, because there were a lot of shop.
To make the code clearer, there were thrown out checks of exceptions and put all in line execution without functions' calls.
#!/usr/bin/perl -w

use strict;
use Image::Magick;

die `pod2text $0` unless @ARGV;

# Create canvas with transparent backgroud
my $image = Image::Magick->new(size=>'1000x70');
$image->ReadImage('canvas:transparent');

# Write label (from first parameter to scrotp) with black color and 30% transparency
$image->Annotate(
	text      => $ARGV[0],
	geometry  => "+50+50",
	pen       => $image->QueryColorname('rgba(0,0,0,0.3)'),
	font      => 'Bookman-Demi',
	pointsize => 40,
	kerning   => 3,
);

# Blur this black label
$image->Blur(
	radius  => 0,
	sigma   => 6,
	channel => 'RGBA'
);

# Create one more canvas with transparent background
my $mask = Image::Magick->new(size=>'1000x70');
$mask->ReadImage('canvas:transparent');

# Write label (from first parameter to scrotp) with black color and no transparency
$mask->Annotate(
	text      => $ARGV[0],
	geometry  => "+50+50",
	pen       =>  $image->QueryColorname('rgba(255,255,255,1)'),
	font      => 'Bookman-Demi',
	pointsize => 40,
	kerning   => 3,
);

# Cut label from the first canvas by the mask of second canvas
# So the first canvas will contain only transparent shadow with no label
$image->Composite(
	image   => $mask,
	mask    => $mask,
	compose => 'Clear',
);

# Write label with white color and 30% transparency
$image->Annotate(
	text      => $ARGV[0],
	geometry  => "+50+50",
	pen       => $image->QueryColorname('rgba(255,255,255,0.3)'),
	font      => 'Bookman-Demi',
	pointsize => 40,
	kerning   => 3,
);

# Cut unused space
$image->Trim();

# Rotate label for 45° counterclockwise
$image->Rotate(
	degrees    => -45,
	background => 'transparent',
);

# Save result into [png-]file
if ($ARGV[1]) {
	$image->Write("$ARGV[1]");
}
else {
	$image->Write("$ARGV[0].png");
}

=head1 NAME
  Generation of watermark
  Result is png-file - будет выгружен в файл с текстом параметра
=head1 SYNOPSYS
  gen-watermark.pl
    no parameters: this information
  gen-watermark.pl
  Parameters:
    text label for watermark
	result file name (if absent name will be equal label)
=head1 DESCRIPTION
  Generation of watermark
=head1 AUTHOR
  Stas Raskumandrin, stas@raskumandrin.ru, http://stas.raskumandrin.me/watermarks
=cut
All the above steps can be done quite easily without the use of perl, only with command line interface of ImageMagick. But in this case there were requirements for the implementation of additional logic.
The code of putting watermark. Like in previous code, all exceptions removed for the sake of clarity the implementation.
#!/usr/bin/perl -w

use strict;
use Image::Magick;
use POSIX qw/ceil/;

die `pod2text $0` unless @ARGV;

# source image
my $image = Image::Magick->new;
$image->Read("jpg:$ARGV[0]");

# get height and width of source image
my ($image_height, $image_width) = $image->Get('base-rows', 'base-columns');

# read watermark
my $watermark = Image::Magick->new;
$watermark->Read("png:$ARGV[1]");

# get height and width of the watermark
my ($watermark_height, $watermark_width) = $watermark->Get('base-rows', 'base-columns');

# source image may be smaller (whole or only one dimension) than watermark
# create canvas to fit both image and watemark

# get height and width of the canvas
my $canvas_height = ( $image_height > $watermark_height ? $image_height : $watermark_height );
my $canvas_width = ( $image_width > $watermark_width ? $image_width : $watermark_width );

my $canvas = Image::Magick->new;
$canvas->Set(size => "${canvas_width}x${canvas_height}");
$canvas->Read('NULL:');

# layer with tiled watermarks
my $tiled_layer = Image::Magick->new;
$tiled_layer->Set(size => "${canvas_width}x${canvas_height}");
$tiled_layer->Read('NULL:');

# Number of tiles in row and column
my $tile_columns = ceil($image_width / $watermark_width);
my $tile_rows = ceil($image_height / $watermark_height);

# increase to the odd number
$tile_columns++ if $tile_columns % 2 == 0;
   $tile_rows++ if $tile_rows % 2 == 0;

# numbers of column and row of central watermark
my $center_col = ceil($tile_columns / 2);
my $center_row = ceil($tile_rows / 2);

# Coordinate of the upper left corner of the central logo (reference point)
my $center_x = ($image_width - $watermark_width) * 0.5;
my $center_y = ($image_height - $watermark_height) * 0.5;

# paving
for my $col(1 .. $tile_columns) {
	for my $row (1 .. $tile_rows) {
		# посчитать координаты верхнего левого угла очередной ячейки
		my $x = $center_x + ($col - $center_col) * $watermark_width;
		my $y = $center_y + ($row - $center_row) * $watermark_height;
		# нанести логотип в указанные координаты
		$tiled_layer->Composite(
			image   => $watermark,
			compose => 'over',
			x       => $x,
			y       => $y,
			gravity => 'NorthWest',
		);
	}
}

# merge down source image
$canvas->Composite(
	image    => $image,
	compose  => 'over',
	gravity  => 'center',
);

# merge down layer with tiled watermarks
$canvas->Composite(
	image   => $tiled_layer,
	compose => 'over',
	);

# crop to size of source image
$canvas->Crop(
	x      => ($canvas_width - $image_width) * 0.5,
	y      => ($canvas_height - $image_height) * 0.5,
	width  => $image_width,
	height => $image_height,
);

# jpg-quality
$canvas->Set(quality => 88);

# saving result
$canvas->Write("jpg:$ARGV[2]");

=head1 NAME
  Putting watermark
=head1 SYNOPSYS
  watermark.pl
    no parameters: this information
  watermark.pl
  Parameters:
    source image path
    watermark path
    result image path
=head1 DESCRIPTION
  Putting watermark
=head1 AUTHOR
  Stas Raskumandrin, stas@raskumandrin.ru, http://stas.raskumandrin.me/watermarks
=cut
Result of these scripts is below.
